As a part of white-label features, Adserver.Online offers all paid plan users an option to use their own custom domain for an ad server's panel. This feature may be useful if you're looking to offer a more unique and authentic experience to your own users.
Prerequisites
Firstly, you should own a domain. Alternatively, you can buy a new one. Besides, you have to be able to configure it. That means you should have access to the DNS management panel and have knowledge of how to use it.
Please note we neither provide support for 3rd party services nor sell domains.
What domain to choose
Let's say your domain is example.com.
Firstly, we would suggest using a subdomain like panel.example.com or whatever name you like for your panel. Therefore, we do NOT recommend using the root domain example.com as a custom domain for your panel, though it's technically possible. The rule of thumb will be to host a landing page with information about your business on the root domain instead.
Secondly, we do NOT recommend using a www sub-domain. It may cause unexpected side effects, and your domain won't be working properly.
How to configure a custom domain
Let's say you chose panel.example.com as a sub-domain for your panel.
The first thing you need to do is configure a new CNAME record in your DNS manager. Make sure your sub-domain has adsrv.org as a target.
The example below is based on Cloudflare DNS. Don't worry if you're not using Cloudflare. Other DNS managers/hosting services should have similar interfaces.
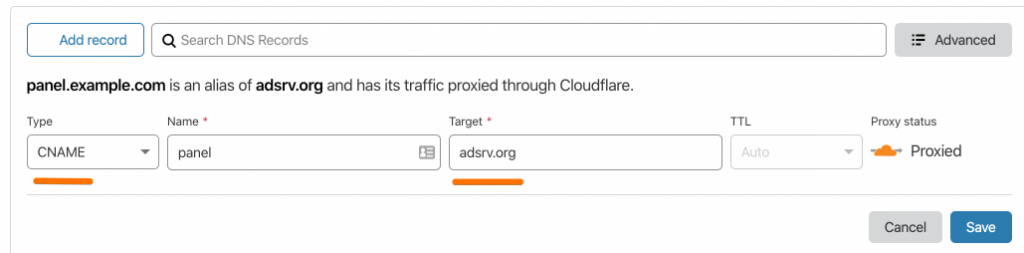
Please note: DNS changes may not take effect immediately, so you will have to wait for some time. Generally, it depends on your domain settings and may take up to 24 hours.
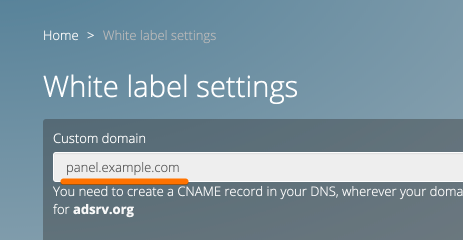
After setting up DNS records, you just need to fill in your custom domain name in the Settings/White-label menu.
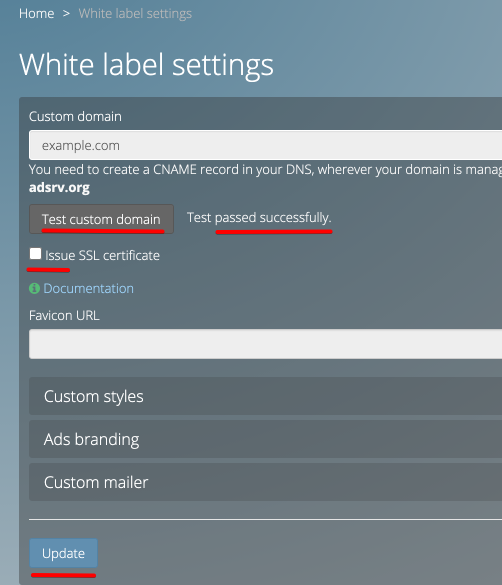
SSL support for your custom domain
You can issue a free Let's Encrypt certificate for your custom domain.
- You should test your custom domain by pressing on "Test custom domain" button
- If the test passed successfully, you will see the checkbox "Issue SSL certificate"
- Tick the checkbox and press the Update button at the bottom of the form.
- A certificate will be issued within a few minutes